|
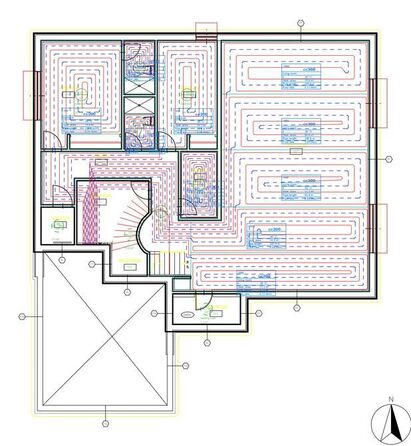
1. Software Design:
Our team uses a software to calculate the heat loss according to the actual floor plans offered by the Builder. Once the Floor plans are imported and heat loss is calculated, the loops are designed accordingly. At this stage the loops have a snail pattern meaning that the supply and return run next to each other, resulting in a more even temperature profile. |
|
|
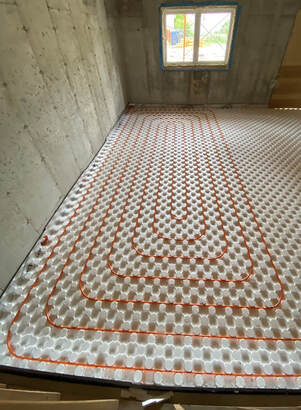
2. Rough in:
The Rough in stage consists the following steps: - Installation of Floor Panels with pox, allows you to have a pipe spacing of 4", 8" or 12". (this Panel has a R-Value of 10). - Installation of side insulation this creates a thermal break between the slab and the side wall isolating the slabs heat. It also acts as an expansion joint preventing the slab from cracking due to the heat expansion. - Finally installation of PEX Pipes according to the Software design. |
|
|
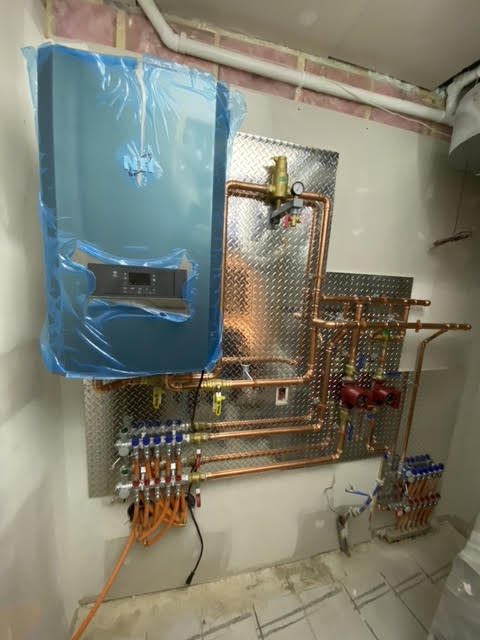
3. Finishing:
Finishing consists of connecting the floor heating PEX Pipes to the Heat source, and control system to assure comfort, efficiency and reliability. |
|
